BamaNV
-
Content Count
36 -
Joined
-
Last visited
-
Days Won
4
-
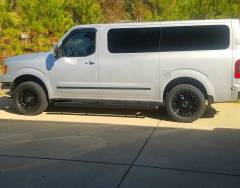 Nice.. the rims look really good..
 -
 Nice..
 -
 Wow, the rims are a really nice touch.. 2 thumbs up..
 -
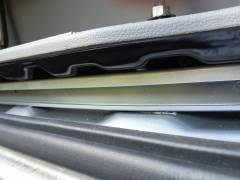
 I'm sorry I can't help you there.. Only because I'm not familiar with that running board, the one thing everyone needs to "note" is when you put running boards on this or any vehicle, you compromise a little ground clearance, and width, my wife tried to go thru our bank drive thru and came home with the passenger side bent up, normally you just jump the curb and the most damage would be curb rash on the rims but nooooo, the running board,, I had to take it off and remove the rivets and use a block of wood and pound out the boo boo. and replace the rivets. I installed curb feelers afterward,https://en.wikipedia.org/wiki/Curb_feeler Also parking decks are a killer for this vehicle, ours stands a little over 7ft, in the rear,,don't depend on those guys who built those parking decks to be a constant height in every space of the parking area, wouldn't want to prove them wrong with the top of your van,, Some have tall van parking, not all and if they only had the entrance and exit gates a little wider it would be sweet, you can get in just have to fold the mirrors in and thread the beast in,, I'm just saying be aware of the increase of width on the sides up high (mirrors) and down low,( running boards) , not much but jumping a curve can damage the running boards, notice how many custom vans you see with busted fiberglass running boards .. ouch..
 -
No you don't remove the mud flaps, you can actually adjust just how much space between the mud flap and running board you want and there is a space between running board and bottom of van..
-
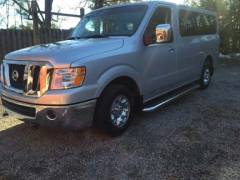
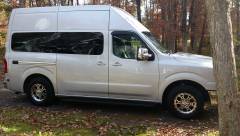
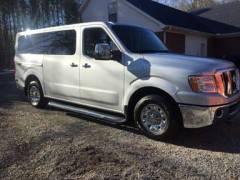
 Congratulations on your Van, that is one nice looking NV..
 -
-
-
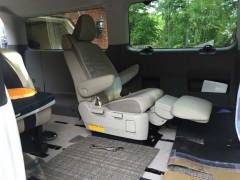
 So far so good.. Lift was mounted by Griffin Mobility here locally.. We elected to slide our daughter out of her Convaid stroller into a Toyota Sienna Reclining Seat, (see pics in gallery)..
 -
-
 BamaNV reacted to a post in a topic:
DiY mounting a Toyota Sienna Seat in a Nissan NV 3500 passenger
BamaNV reacted to a post in a topic:
DiY mounting a Toyota Sienna Seat in a Nissan NV 3500 passenger
-
harold50 reacted to a post in a topic:
DiY mounting a Toyota Sienna Seat in a Nissan NV 3500 passenger
-
Accessories..
-
-
 Here is a link to the lastest project on our Nissan NV.. We wanted a little better seat for our daughter to set in, so we decided to try to mount a Toyota Sienna reclining seat into our Van, which will help when she's having a bad day to be able to recline ( when we stop ).. It will help with preassure point reposition.. This is a google slide.. Just look and read each picture so you will have a fulll understanding of this project before attempting.. enjoy...... https://docs.google.com/presentation/d/1i3A2FHjY7JgVN2cxUsxAGn7oXDpek7WihrmZ-MvHHKM/edit#slide=id.gb02c897ac_0_22
 -
-
-
-
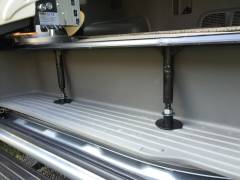
 Who cares what it looks like at this stage, it's going to be covered up,, nice going looking for the finish..
 -
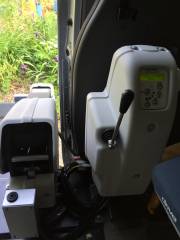
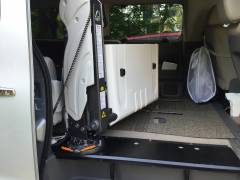
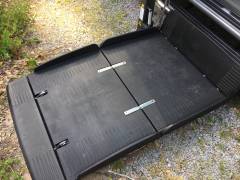
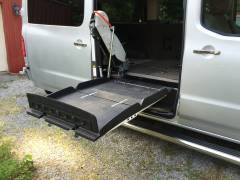
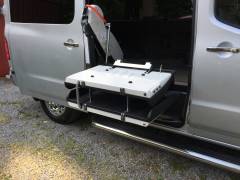
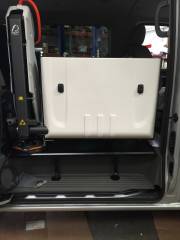
To all who is interested here is a different option for a handicap lift, it is called a Fiorella 500, load cap. 500lbs. We wanted it mounted in the back but would not clear the bumper, so in the side it goes, clears the runnings boards (yeeeaaa) and has a swing away feature which is huge to the care giver. Comes fully automatic, but we opted for the semiauto, additonal bracing is needed, as you will see in the photos, They have demos on the Tube of this lift,,,( O yea check out my photo gallery for pictures).. BamaNV thanks
-
-
-
Turns out the roll-a-ramp is not a good fit for us.. just wanted to follow up.. still looking at options.. stay tuned..
-
-
-
-
They are not bad, you'll get instructions for the short driver side step only or we did.. If your handy with a drill and have a short battery operated impact..(fits between the body and frame where the drill will not) I used galvanized self tapers for the under body part and the bolts that came with the running board package.. Also I bought some galvanized spray at Lowe's for the holes to help prevent rust.. the measurements I used was from the passenger side wheel well was 10in- 26in - 26in - 26in- 10in left at the end..= 98in.. be sure to look underneath and not come out where the access holes with tape over them are.. you may have to adjust an inch one way or another ,,,the driver side was a little trickier , you have air conditioning thingy underneath so I measured from the front wheelwell 10in back for first bracket to match passenger side and went to the back and measured from the wheelwell back to the one nearest the back tire to match the passenger side I think it was like 17in in.. the next one I put it as close to the airconditioner thingy as I could to get the impact betweeen the frame and the body then half the distance between it and the one at the front... You'll need an impact with attachments for self tapers ( I recommend galvanized not zinc coated) .. the two nearest the front had to have washer shims between the self tapers and body on both sides (driver and passenger side) because the brackets don't set flush next to body if you don't the steps will lean down ward.. This maybe clear as mud,, if your having an problems or questions let me know, I'll do the best I can to answer.... EuroCamper was the cheapest we could find.. O yea one more thing a set of ramps to jack up the side your working on helps,, don't do like me and ruin a set of plastic ramps by not putting a sheet of plywood underneath or the weight of the NV will crack it when it mashes it in the ground... thanks
-
-
New NV-P 3500 Owner in Boston, with Quigley 4x4 conversion
BamaNV replied to PonyJeff2k1's topic in Conversions
Nice,,, I like... B) B) -
Got these Luverne Mega Steps mounted yesterday.. Purchased @ EuroCamper http://s1353.photobucket.com/user/dign-nbama/media/IMG_0086_zpsgtzircui.jpg.html http://s1353.photobucket.com/user/dign-nbama/media/IMG_0085_zpsh0b56obb.jpg.html