

JB Harlin
-
Content Count
30 -
Joined
-
Last visited
-
Days Won
11
Posts posted by JB Harlin
-
-
It has been a year now and we really do like the LED interior lights!
-
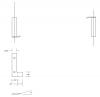
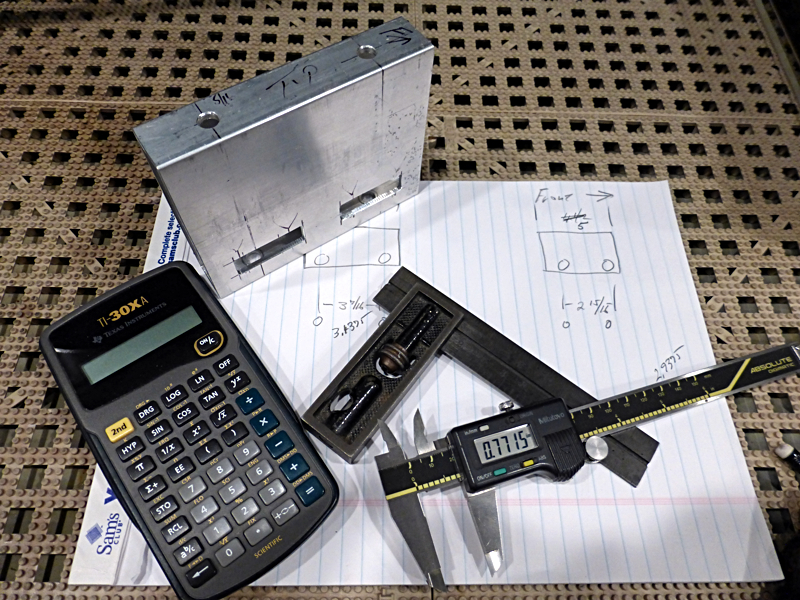
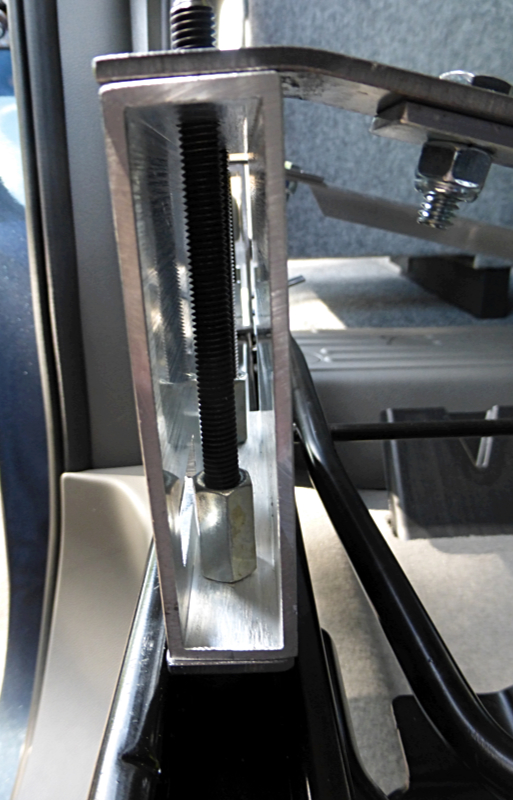
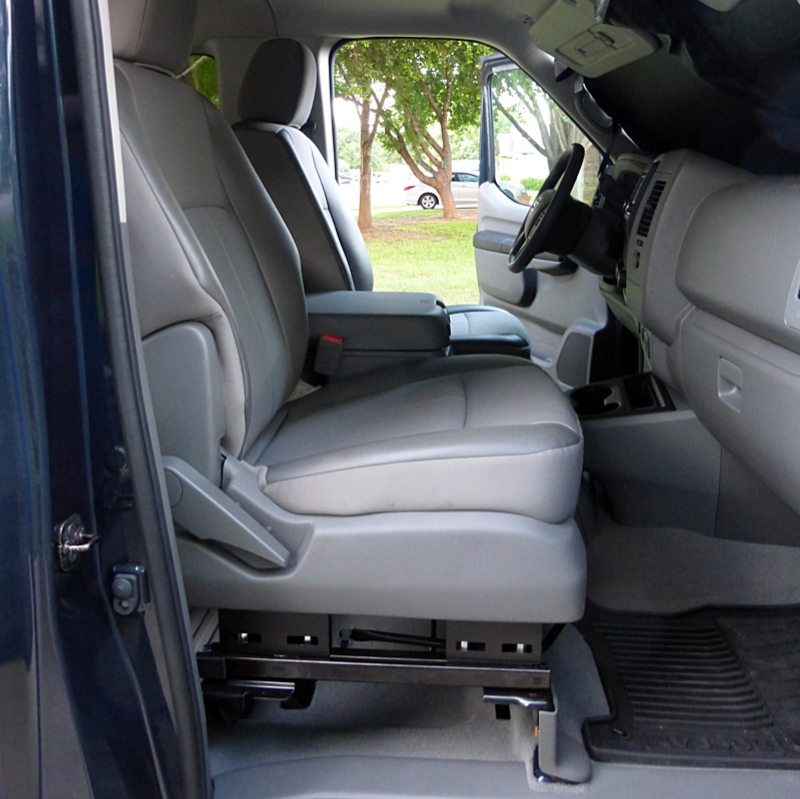
My wife has not been happy with the passenger seat in our NV P. We have the SV so the passenger seat is not power like the driver seat. She says it is like sitting in a hole and she could not see over the dash. Sure enough we did some measurements and since I have the driver seat full up, the passenger seat was 4” lower. Time for some redesign. . . did a lot of research and there isn’t much off-the-shelf that would work. So, it was time to make some measurements, make a quick CAD drawing, cut some metal and build a seat riser. Here are a few snapshots of the triple gusset seat riser and installation. She really likes the view now!


-
-
We have a 2016 and I will have to check to see if it has the predicated lines. . . never noticed.
Checked today and we do not have predicted course feature???
-
This video explains it better than the manual. . . :thumbsup:
https://www.youtube.com/watch?v=hNgqvc5-_tM
You can also pickup a PDF of the Navigation System here. . .
http://www.nissan-techinfo.com/deptog.aspx?dept_id=166http://www.nissan-techinfo.com/deptog.aspx?dept_id=166
-
I have never done much with the BU Cam, except use it as factory setup. It works great for me as is and is certainly better than anything I have ever had, since I have never owned a vehicle with a BU Cam. If there are 5 pages in the manual, then there must be a lot of setup options???
-
Hahaha! I agree with Rad, JB is from now on my go-to guy! ;). I had no idea the horn could be shut off, I think I'll do that today....! Thanks for the info!
Thanks for the vote of confidence guys. . . but. . . I may have read that manual but that doesn't mean that I remember it all. :headscratch:
-
I need to try this just out of curiosity. Where did you learn it? Is it in our manual??
Yes, it is in the manual. That is the first thing I do. . . can't stand the honking.
Could be that TAmc41 might have punched the buttons or maybe the computer has gotten confused. Worth a try to see if it fixes the problem. BTW; I am obsessed with reading manuals! B)
-
-
I still check what is new here most every day. . .
-
Did this mod yesterday. I am not a machinist by trade, but I have spent many an hour cracking a lathe and mill and I am pretty handy with most tools. By far the most difficult task it getting the tube out of the air box. Before I removed it I marked the tub as far as I could about 3/4" from the inside of the box, to get the correct entry angle. Once I fought the tube out of the box, I wrapped a piece of paper around it to finish the mark around the circumference and scribed it with a utility knife. Cut off the excess with a coping saw, sanded the end flush, deburred the edges and polished them with a buffing wheel. When reinstalled the tube now protrudes about 5/8" into the air box.
Do not have any gas milages numbers, this is the 6 cylinder NVP SV. One thing I did notice right off the bat was much smoother throttle response. We'll see how this works out.
-
If you go to the CoverCraft site, they sell the bag. . .
http://www.covercraft.com/cartlink/index.php?cust_id=covercraft&prod_id=uvcs#cl-tab-addons
-
Been looking at the Covercraft UVS100 on Amazon. Haven't ordered one, but probably will be the choice to replace the old, worn out, spring-loaded screen that came from another vehicle that we are using now.
I would like to hear if anyone else has one of these???
-
Greetings from Benbrook. . .
-
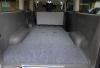
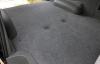
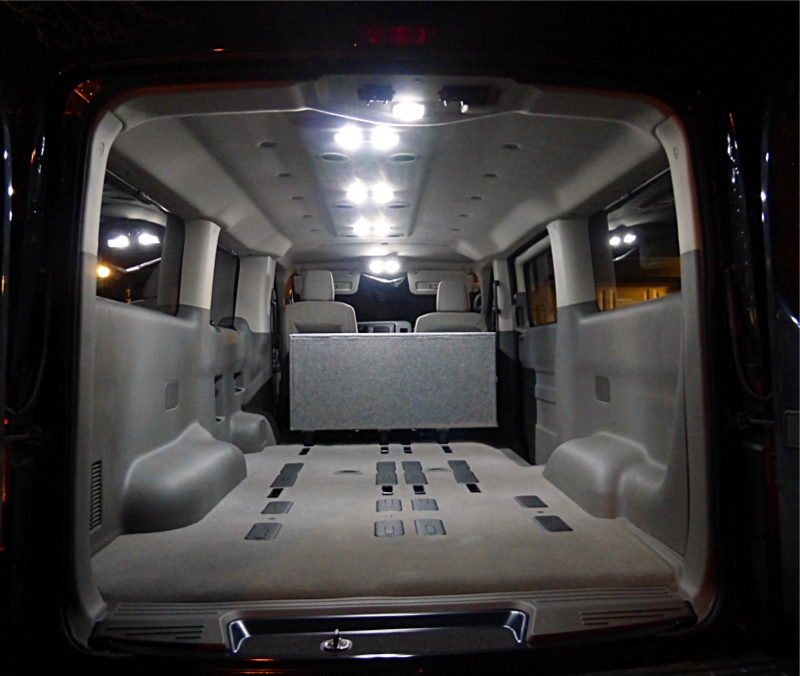
Thanks everyone. We just wanted a nice smooth floor. Everything we did is easily removed if we ever want to rerun to the original factory configuration and the seats. Here are a few more snapshots. . .
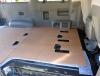
Here is the fitting of the hardboard
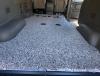
Carpet pad installed
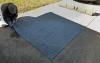
My wife cutting the new carpet
-
We have been working for the last few weekends installing a solid floor above the seat rails. We will be using the NVP to haul our equipment and need a relatively smooth, carpeted floor. We removed the factory carpet, added closed cell foam filler, then a layer of hardboard. Over the hardboard we added carpet pad and then a layer of carpet.
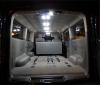
With the tripod box installed, we are ready for the road. . .
 wollip and Ben Murphy reacted to this
 -
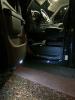
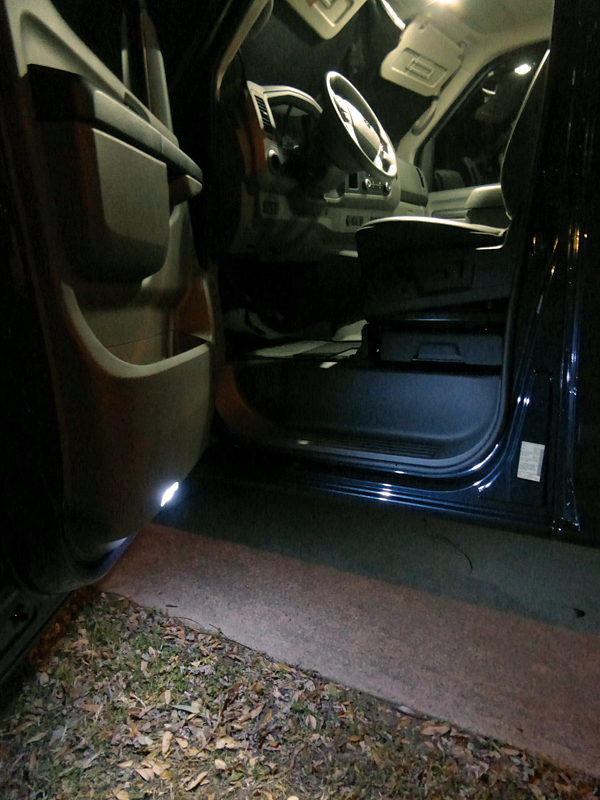
Do you mind telling me where did you get the lights from?
Not at all. . . Amazon. . .
http://www.amazon.com/gp/product/B014KMSLLS?psc=1&redirect=true&ref_=oh_aui_detailpage_o04_s00
Here are the step lamps. . .
http://www.amazon.com/gp/product/B0152WNJKI?psc=1&redirect=true&ref_=oh_aui_detailpage_o02_s00
Stavros Christopoulos and Gman65 reacted to this -
Finally got all of the interior lights replaced with LEDs. Even did the step lamps. . .
-
-
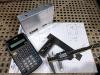
Doing some research I found the part numbers for the long seat rail cover and clip;
OEM Nissan part #74813-1PB0A Long Seat Rail Cover
OEM Nissan part #74813-1PB1A Retainer Clip
-
I've done the ratchet strap through the brackets and also have carabiners that I clip in. Both are good but can still have movement unless you really crank down on the strap. Your design looks solid.
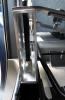
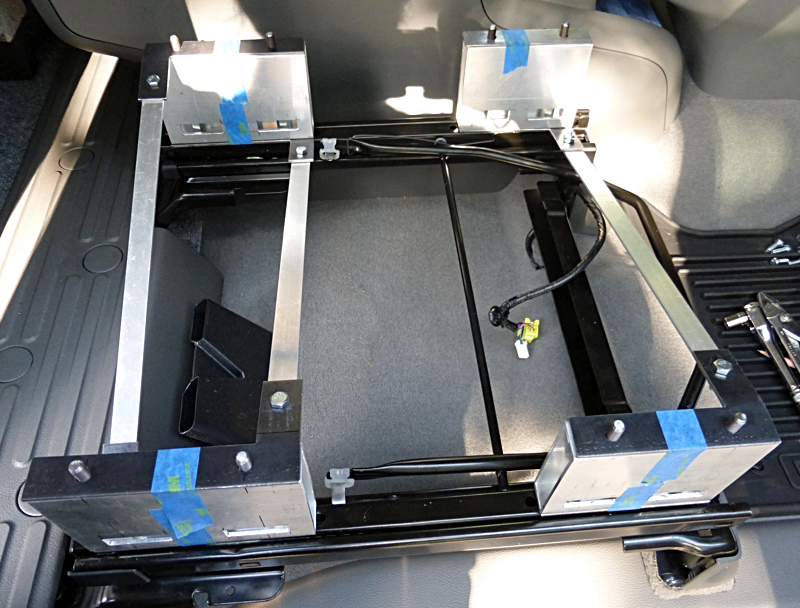
It is extremely solid for sure. The box itself is pretty heavy and is designed to carry 4 tripods that weigh between 14-19 lbs each. The idea is the box also acts as a separator between the front seats and the cargo in the back. We have had this same arrangement in two other vehicles and it has worked extremely well for the way we work and travel. I will be looking at ratchet straps, but only to keep things from shifting around, if needed. We did a lot of research and believe the NV is an exact fit for what we do.
Are you using your NV as a camper only, or does it get transformed back into a people hauler? Just curious. . .
-
Here is the entry from our BLOG on the project. . .
-
Very cool. Thanks for the extra photos. I'm always looking for new ways to bolt things down in my van and camper!
This is pretty much a permeant installation. . . it is removable, but will require a lot of disassembly. Ratchet straps would work very well ran through the seat brackets for temporarily holding things in place.
-
That looks really nice! How are they attached to the seat brackets?
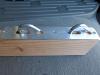
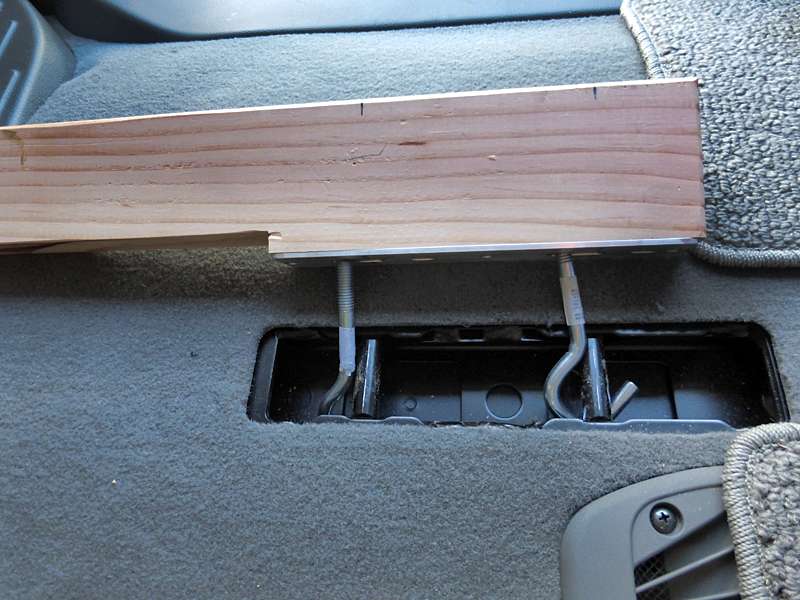
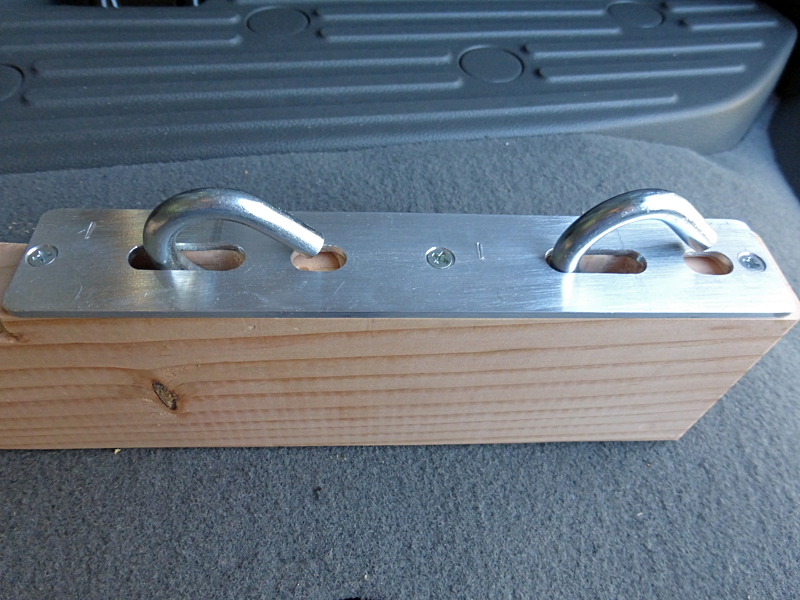
Custom machined mounts from wood and aluminum, using a couple of 'J' bolts. You can see the basic idea in the photos. There are three of these. Once secured to the seat brackets, the box was bolted to the mounts.


DIY Passenger Seat Riser
in Accessories & Modifications
Posted
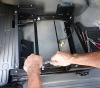
Thanks! I assume your driver seat is not power, like what we have on the passenger seat in the SV. The seat is bolted to the slider base with 4 bolts on each side. You can see in the photo, I extended those bolts, which are welded to the slider using hex couplers and threaded rod. The extension blocks are bolted to the slider using those hex couplers. The threaded rod is cut to length to bolt the seat back to the top of the riser extension blocks. I cross braced the extensions for rigidity. No reason you couldn't use 2" box aluminum for the risers. Note: if your seat has the side air bag, you will need to disconnect the the wiring harness under the seat. BE SURE TO DISCONNECT THE BATTERY BEFORE REMOVING THE SEAT AND THE AIR BAG CONNECTOR. The wire should be plenty long once you raise the seat. . . just be sure it is routed so it does not bind.
Good luck and let us all know how it goes! :thumbsup: