
Carmen
NV Member-
Content Count
33 -
Joined
-
Last visited
-
Days Won
4
Content Type
Profiles
Forums
Gallery
Everything posted by Carmen
-
This link to the hitch may help http://www.curtmfg.com/part/31061. The square tube cross piece bolts to the end plates which bolt to the frame. After fitting the end plates to my frame I found that the cross piece needed to be about 1" shorter and it needed to be raised and moved back where it attaches to the end plates. A friend of mine does machine and welding work. After I marked up what I needed done he first cut off one of the flanges from the square tubing, cut about an inch of tube off then welded the flange back on. The new bolt hole locations for the end plates were made using a broaching tool to match the original square holes (for the supplied carriage bolts) although round drilled holes could be used instead. After fitting together the assembly the side plates needed to have material cut from the bottom and front since the cross piece flanges were now located higher than a bit back from what was designed for the 4x4 Titan. Unfortunately, since the front receiver is about 4" lower than the rear receiver, I do not have sufficient ground clearance to start my trailer up my driveway since it has about an 8 degree slope. Looks like I need to get a new "stinger" for the Hensley hitch with a 4" rise. However, on level ground it is great for maneuvering the trailer. I found the hitch for $165 on line.
-
The local hitch builder wanted $650 to make one which was too much for me so I bought a Curt front hitch for a late model Titan. I had a friend cut about an inch off the cross bar and trim the end plates to mount the cross bar up and back from the Titan arrangement. Since it's all bolted it made it relatively simple. I can reinstall the tow hooks but I needed longer bolts and haven't done that yet. For the record Curt did not suggest or approve this application. I did this mainly to push a travel trailer up my driveway and help with maneuvering.
-
Don't know why it likes to rotate my photos...
-
I put L track on my walls and floor. Here's a photo when we were moving cross country.
-
I've carried my Ducati MTS1200 and a Suzuki DR650 in my high roof although it doesn't answer your question. Typically use the D rings but I recently installed some floor mounted L track and can bolt down a Condor bike mount when needed. There is a photo in this threadhttp://nissannvforum.com/topic/1060-what-have-you-done-to-your-nv-van-lately/ . I'll take pictures with the bike in it if I get a chance. Hauling bikes and pulling a travel trailer is primarily why I bought the NV.
-
Thanks. It depends on the compressor as they offer different duty cycles and output. I paid about $280 for the kit but I found an "open box" discount on Amazon and it came boxed up like new. I guess they had it sitting out on display. I had to spend about $30 more for materials including heavier gauge wire to run from the battery to the compressor. I looked at mounted the compressor just in front of the battery but since the relay had to be mounted on the tank it I decided to mount the compressor out of the way next to the tank. They apparently use these a lot for Jeeps and such and go off road and deflate their tires for traction then air them up again for pavement.
-
PS, I don't know how my pics rotated after uploading them...
-
Just installed a Viair air compressor with 2 1/2 gallon receiver. I wanted to be able to easily air up tires on the van, motorbike, Airstream, etc. while traveling the US. On/off switch is in the cab next to the pressure gauge. I made up some brackets and strapped the compressor and tank to the frame on the drivers side. It was tight and I wasn't sure if it would fit but managed to squeeze it in.
-
The tank and compressor are going between the frame rail and the body on the drivers side. I puzzled over the compressor and had planned to fabricate a platform in front of the battery. But when I found out the relay is mounted on the air tank there was no point in running power from the battery back to the tank and back up to the battery. I suppose I could buy another relay but decided against it. I'll post up some pics next week when I should have the install completed but here's one of the tank support brackets. Bob
-
Thanks for the feedback. I need to add this to my project list!
-
Subscribed! Can the fan be opened to vent the rear while driving or is it too much drag/pressure on the lid when cranked up?
-
I tow a 25 ft. Airstream with a V8 NV2500 cargo model. I also have a Hensley WD hitch which works great. They cost crazy money new but I found one on Craigslist to make it worth while.
-
I first replaced the stereo and speakers using a Pioneer NEX 4000 head unit and installed the Pioneer backup camera. I put a USB socket beside the rocker switches so I can plug my phone in to use CarPlay. I installed a partition wall, cut in a sliding window, installed floor and wall liner (still need to trim it out and tie down track. Currently installing an onboard air compressor with 2-1/2 gallon tank. It will come in handy to keep the travel trailer and van tires aired up and for miscellaneous needs. Also gives me the option of adding air bags or an air horn! Can no longer rely on gas station air and I'm tire of fooling with cheapo portable units. Still a work in progress.
-
I'm mounting L-track on the walls and will also on the floor after I bolt down 3/4" plywood. I'm in the middle of doing the work but here are a couple of pics using rivets to attach the L-track to the wall. I'm also setting it up to haul bikes and will get a front wheel chock and configure it to bolt to the floor track in various locations depending on what I'm hauling. Bob
-
I can't answer you question but for what it's worth I replaced my head unit and find it an easy reach in the NV that I don't miss the steering wheel controls. The head unit also came with a remote control that I leave in the small bin under the radio and sometimes grab it for volume adjustment. It's also good if you're in the back of the van.
-
Good idea! Thanks for sharing.
-
You remove the 4 (if I remember correctly) screws from the bottom of the console. There is single electrical connector underneath the drivers seat that you must unplug and feed it back underneath the floor covering. You pull out the tray underneath the seat to get better access. The connector is underneath the covering but it is slit to provide access. I had to struggle a bit do separate the connector as the space is tight and it's not obvious how to release the catch but it's not bad.
-
-

NV Audio System Upgrade questions
Carmen replied to Keathbordeaux@aol.com's topic in Audio & Navigation
Glad to do it. I'll try to add some more when I get farther along. -
I can't say yet. I've got a couple of more days to still terminate everything and get it going. Still need to mount an amplifier under the seat and a small subwoofer. It's turned into more of a project than I initially planned but I intend to use the van for several years for touring with a travel trailer while retired and thought this will be worth while.
-

NV Audio System Upgrade questions
Carmen replied to Keathbordeaux@aol.com's topic in Audio & Navigation
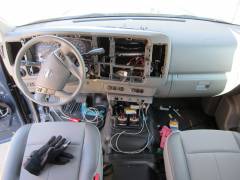
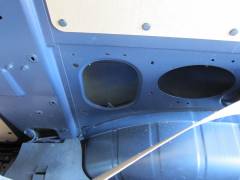
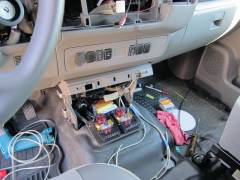
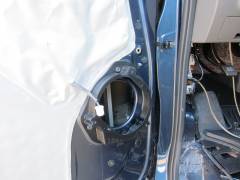
Similar to Glidedon, I've taken my dash and doors apart to install a new Pioneer NEX 4000 head unit with backup camera and new speakers and amp. I posted some photos in the gallery that may help you. -
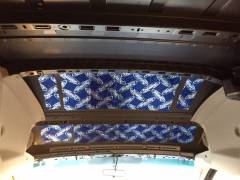
From the album: Stereo Install Photos
Dynamat installed above windshield on high roof to deaden noise from hitting every bugs. -
-
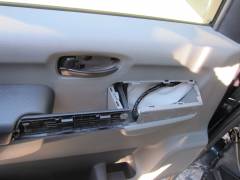
From the album: Stereo Install Photos
Ready to remove door panel. Remove switch plate, pull trim piece and trim piece under door release (remove this by pushing forward and out from the rear "wide" end). -
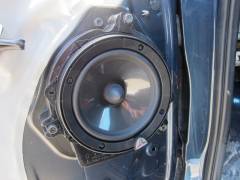
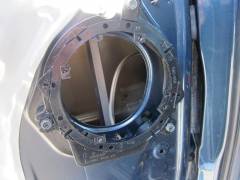
From the album: Stereo Install Photos
New door speaker


