

Local Apparent Friday
-
Content Count
427 -
Joined
-
Last visited
-
Days Won
57
Everything posted by Local Apparent Friday
-
2016 or 17 meetup/gathering... Missouri?
Local Apparent Friday replied to radin2son's topic in Events & Gatherings
Okay cool, I'll look for something out that way next year on the way out west. I'm hoping to attract more ppl to the forums, and to connect with more overlanders. -
2016 or 17 meetup/gathering... Missouri?
Local Apparent Friday replied to radin2son's topic in Events & Gatherings
@Cargi Goes When you see the text with the underline, it's a hyperlink. I had linked the Adventure Van Expo in this thread in an attempt to see if anyone wants to meet up. It is a countrywide show, they are in Bend, Oregon right now and put up a 50% off code for tickets, so I messaged them to see if they will have a discount code available for when they are in Chattanooga, which is where I am inviting you all to meet up, the first weekend of October. @radin2son We're not far from Cville, it's nice that time of year. Lots of apple festivals. The distance must be killer for you all though, it'd be a haul. We'll be out west next year, so we'll catch you either way if you're down. I just looked up overland expo and it's the very next weekend after ADVan in VA, so we'll probably hit that too. Ty -
2016 or 17 meetup/gathering... Missouri?
Local Apparent Friday replied to radin2son's topic in Events & Gatherings
They had put out a 50% off discount code for Oregon, I've messaged them for details. Once they get back to me, I'll start a separate thread to hopefully garner more attention, but it's inked on our calendar, so we're going. -
Looking to switch platforms
Local Apparent Friday replied to Local Apparent Friday's topic in Welcome! Introduce Yourself!
K sticking a fork in this and calling it done, we'll be moving over to a conversion thread soon enough. She drives wonderfully after an alignment, it was a bit out of whack, but I knew that based on the tire wear of the old tires. I will continue to monitor the catch can and will be posting my findings in that thread. I'm planning on about 1000 miles on the current oil and descaling mix, and then we'll change the oil and go back to coolant. Only other thing of note is that we added a bear trap branded filter magnet....I like to be able to cut apart my filters and see what's going on when I change the oil. -laf -
Right there with ya...the whine of an electric motor just doesn't get the blood flowing like a big lopey cam, regardless of 1/4 mile ETs.
-
I was just reading an article about a company getting started that has made a highly modified tesla motor designed to fit in any application where you can fit a small block chevy. No idea how we're going to charge all this stuff or dispose of the batteries, but EV is rushing towards us quickly.
-
DIY "Must Haves" for extended road trips?
Local Apparent Friday replied to Daydreamin520's topic in Maintenance
That's slick and the inside of your van...that's some serious fit and finish from what I can see. What do you store in the box, or is it just housing wiring? -
https://tflcar.com/2022/06/nissan-nv200-small-van-replacement-caught-testing-is-it-an-ev/
-
How and Why of Adding a Catch Can
Local Apparent Friday replied to Local Apparent Friday's topic in General Discussion
We'll be there, portable shop in tow.? -
DIY "Must Haves" for extended road trips?
Local Apparent Friday replied to Daydreamin520's topic in Maintenance
That's a neat spot to put a box. I normally keep my spare fluids on the back half of the shelf because it keeps them from rolling around. I've got a box of oil and a jug of distilled water there right now. I'm liking the idea of underhood storage, I think I'll explore that more this weekend. Of course all of this can be left at home if you're on the main roads and/or can afford to replace it with a credit card and sat phone. We're planning on going way off the beaten path... lessons learned; I once got to change a tire 40 miles from the nearest paved roads in the north Maine woods with no jack or cell service. AAA won't leave the pavement. We have them and Good Sam though, and now I carry the aforementioned compressor kit. -
How and Why of Adding a Catch Can
Local Apparent Friday replied to Local Apparent Friday's topic in General Discussion
Come to the Adventure Van Expo in Chattanooga in Oct and I'll do it for you. -
The Sylvania silverstar ultras are the brightest available from Sylvania, according to Sylvania. I have run them in many vehicles and never had to replace one.
-
DIY "Must Haves" for extended road trips?
Local Apparent Friday replied to Daydreamin520's topic in Maintenance
Surprised that the original question was never answered. The spark plugs require a 16mm deep socket, of which there are specific spark plug sockets that have a rubber collar inside to grab the plug and pull it out of the hole. You'll also need a 10mm to remove the bolts that secure the coils. Having just changed an engine, if I were putting together an absolute bare bones tool kit, I would pack: 8, 10, 12, 14, 16, 17, 18, 19, 22mm sockets, an appropriate selection of short and long extensions, and a short and long 3/8 ratchet and breaker bar. That'll get you pretty much the entire driveline and suspension components. Additionally, short and long phillips and flat heads, a pair of pliers for hose clamps, and the same sizes each in a box end wrench. A hammer is never a waste of space, a drift, a good pair of work gloves, a good light, a 12v compressor kit with tire plug kit (I use this exact model and love it, although the box cutter leaves something to be desired, also add a valve stem removal tool) a fire extinguisher, a portable jump pack, some marinetex or other 2 part bonding epoxy, a propane torch, PB blaster, duct tape, electrical tape (3m Super 33+,) one of those canisters of various heavy duty zip ties, and some bear spray and you'd be pretty damn self sufficient. If you have room, add to that spare oil and coolant. Those are my quick thoughts..when we get out for real I'll revisit this. There's always room to squirrel away tools...much of this could fit in that nifty little sliding drawer under the seat. You could also fabricate and add a tool chest in the engine compartment in front of the battery. Oh and TP! You can never go wrong with TP. -laf -
Greetings all! Throwing up a tek for details on the catch can. I am posting this in the general category because I expect a similar issue and procedure for the V6 as well. Pictured is an airaid intake, procedure is the same regardless of what induction system you are running. Total Cost is about $60, total time to complete is about an hour of actual work, and another couple of hours figuring out where you want to mount the can. ? Materials List: (1) Catch Can 3/8" Fuel Hose (length will depend on your install location, I bought 12' for mine and had extra. Generally available from your local hardware store/marine supply and costs about $2.20/ft at the time of writing (2) 3/8" Barbed Tees (8) 3/8" hose clamps in addition to the 4 factory ones that you can reuse. Linked are the factory clamps if you want to maintain the look. Alternatively, you can source stainless hose clamps locally. (2) 10 flat washers (.14 cents each at ace) (2) 10-32 nyloc nuts (.28 cents each at ace) Stainless dish scrubbers Tools: A pair of plyers for the hose clamps A flat head screwdriver if you are using aftermarket hose clamps A metric 4 allen wrench for the included hardware A 9mm wrench for the nylocs #21 drill bit I'll save myself a long winded explanation...if you're not familiar with PCV systems and their history, you can read all about it here. Now if you're thinking about it, you've realized that you're sucking all that gunky air full of oil and gas vapors into your intake, which leads us to where we are now. For those that were watching the engine replacement thread, I mentioned that we tore down 3 separate VK56DEs from three different vehicles (titan, armada, and NV3500,) all three had a thick layer of oily goo and residue in the downstream intake runners of the intake manifold runners and the head, as evidenced by these pics: Easy enough to clean with some brakleen and rags, but we want to eliminate that from the system to prevent gumming up of the valves and injectors, smooth out the airflow, and also prevent the engine from burning that low octane gummy gunk. while still maintaining the integrity of the PCV system. If you are looking at the VK56DE induction system, you will see 4 hoses. There are two 3/8" hoses on the front of the engine that go directly from the PCV valves in the rocker covers to the intake known as the PCV hoses, and then two larger 5/8" hoses on the back of the rocker covers that run to the intake tube, known to Nissan as blowby hoses. In checking the intake, we see that the gunk is introduced at the PCV intake, and that the unregulated blowby hoses do not seem to be introducing any garbage. As to the reason there are 2 separate systems, my research says that the blowby hoses are meant for operation range wherein the vacuum is not enough to open the PCV valves. Here are pics showing the clean intake and tube, thus isolating the PCV system as the culprit. Enter the amazon special $23 Alavente catch can. If this item is discontinued by the time you check, just do a search for "catch can" and there will be many. You can spend as much or as little as you want on these things, but the general idea is that the air has a chance to condense with the oil settling out in the catch can and clean air returning to the intake. Here are some pics of the can. This system needs to be a closed system to maintain the integrity of the PCV and to not suck unmetered air into the engine. This particular (cheap) can has a "filter" but this is basically just a couple holes drilled through a small removable compartment. More expensive cans may feature 50 micron metal filters. In my installation, I cut apart the included filter and used the screen and filter material to make my own. I did this because I will be filling the can with coarse steel wool to promote condensation and filtration, and we don't want to suck small metal shavings into the engine. I recommend you use stainless dish scrubbers, which have a much coarser texture and are available at the dollar store, but I was trying to get this done with what I had on hand. I may switch it out in the future. Important to note is that I reversed the labeled in/outputs so that the air going out hits the little filter, as opposed to coming in. You will not use the teflon tape, 4 of the o-rings, the cheap hose, or the 4 larger bungs. Using the supplied nuts is optional, I swapped for 10-32 nylocs. For the 3/8" PCV system, you'll use the smallest of the barbs that are included with the filter. Additionally, you'll need a number 3 o-ring for the dipstick, and I gently filed off the anodization to make it easier to see the oil level when I check it. Next, find yourself a nice plum, flat spot to drill into to mount the oil catch can. This looks like a good spot. I kid, I kid. Please don't drill into your battery, just checking to see if you're awake. In order to promote condensation, the can wants to be away from the engine heat as much as possible, while still being accessible enough for you to empty regularly. Unfortunately, most of the good spots on the NV are nigh impossible to get to the backside of (ie that sweet flat spot on the inner fender in front of the battery) and I'm not one for self tapping screws. In my particular instance, I opted for the front of my brand new airaid box, but I will likely move this to the lower radiator support once I tackle the bumper project. Putting it there would get it down into the cool air stream, and would still be easily accessible from the bottom after you remove the plastic skid guard for the oil change. At this point, you need (2) 3/8" barbed tees, available from home depot/lowes in either plastic or brass, a bunch of hose clamps, and 3/8" fuel line. Connect everything up so that it goes PCVs from rocker covers to a tee to catch can, then out to a tee and to the intake manifold ports, and you're good to go. Zip tie everything where it makes you happy, and off you go. Also I added (2) #10 flat washers on the bolt head side and (2) 10-32 nylocs in place of the included hardware that came with the oil can. Now just remember to empty the catch can during oil changes so you don't suck everything up into the intake. I am in the process of "breaking in" this newly swapped engine and will post back with a report of what kind of condensate levels I am seeing, but generally these things work as evidenced by any good google search or time spent around performance vehicles. I do not have access to a 4L, but I would expect similar gumming and a similar procedure. my future modifications are to swap to the spring style factory clamps (I ran out) and possibly see if I can find black Tees instead of white, simply for continuity. Thanks for reading, best of luck. Fair winds and fun adventures! -laf
-
Sweet, it's a beautiful area. Stoked to follow your pics.
-
Looking to switch platforms
Local Apparent Friday replied to Local Apparent Friday's topic in Welcome! Introduce Yourself!
I missed this the first time, thanks for the kind words. It was super stressful to have a CEL, but luckily I was able to work through it and get it resolved. We drove it home from our shop tonight, headed for an alignment in the morning. -
@radin2son Still out there dodging fires?
-
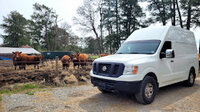
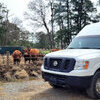
Super neat. This is the eclipse that started our van adventures...we flew to Denver and rented a transit high top from enterprise truck division...for whatever reason rental cars in CO don't charge mileage. Hotels were super hard to come by/expensive, and we didn't want to get stuffed by bad weather. It was an absolutely wonderful trip on which we proceeded to put just under 1900 miles on that van between CO, WY and SD, it was a great time, and the result is that now we are here, with you guys. See you in '24!
-
2016 or 17 meetup/gathering... Missouri?
Local Apparent Friday replied to radin2son's topic in Events & Gatherings
Sooooooo...how do you guys feel about Chattanooga in October? -
Find Fellow Toolheads
Local Apparent Friday replied to Case Sensitive's topic in Events & Gatherings
@Case Sensitive Come back and play with the cool kids! To keep this going, we're in the Mid Atlantic region, with frequent wanderings from as far south as FL and North as Maine. As to skills...I'm one of those guys that can pretty much figure it out, but my wife and I both have very strong backgrounds in marine systems design, electrical, mechanical, and plumbing. Additionally, I am versed in car alarms, audio installs, fiberglass construction, performance modification, home construction, heavy equipment operation, welding, sailboat rigging/vessel operations, CAD design, etc etc, among other things. Oh and motorcycle maintenance/endurance pit crewing. ?- 1 reply
-
- 1
-

-
Pulls hard right
Local Apparent Friday replied to 2013NV2500's topic in Brakes, Chassis & Suspension
@Alex @WanderlustAV Hey something else to check and make sure...did they reset the steering wheel position sensor after alignment? It's a quick step on a diagnostic computer, but I was doing some research ahead of our alignment, and my Dad had a similar experience to what you are describing because the shop didn't do it. A quick google search shows that missing this can cause all kinds of weird things. Hope that helps. -
Looking to switch platforms
Local Apparent Friday replied to Local Apparent Friday's topic in Welcome! Introduce Yourself!
It's been a day, just getting back from the shop. I was able to get the headers tightened again, 36 lbs per JBA specs. It's a bit quieter now. I haven't been able to track down the Mode 6 Diagnostic Data Sheet from Nissan, but using the real time generic data, a buddy of mine that works for Tesla caught that it was just the passenger bank that was misfiring, which I had completely overlooked. That eliminated a vacuum leak, the EVAP system, and any issues with fuel, so I set about removing and testing the various components. Ultimately it was the VVT solenoid that was stuck. The P/N didn't match the ones that I pulled from the armada, so I used my test bench to actuate the solenoid while I cleaned it with brakleen and got it working again...likely just a piece of debris that got stuck in my various wrenchings. She's running tip top with no CEL now, so tomorrow I will finish the catch can install, put the cowl and hood back on, then put the cab back together in time for a 4 wheel alignment on Friday morning and we'll call this swap done and successful. Pic below is of the data from Mode 6...for anyone that's curious, I'm using an OBDLink LX that I snagged from ebay for $34 a while back, it's been a great tool for working on all these fancy fandangled modern contraptions. I highly recommend snagging one if you have the chance and throwing it in your tool box, it'll also output everything a scanguage will and a whole lot more. Thanks for all the support! One other thing that I was noticing I had wish that I had done today...when the engine was out and everything was apart, it would have been a prime time to use a blow tip on the air compressor to clean all the bugs out of the front of the radiator by spraying it from the back forward. C'est la vie. -laf -
Looking to switch platforms
Local Apparent Friday replied to Local Apparent Friday's topic in Welcome! Introduce Yourself!
Oh we are just getting started. I've also added the link to the bio on our instagram...hoping to pull some of the 8 or so NVs that follow us here for info, but not a lot of people these days spinning their own wrenches. Current total all in for the van, the engine, and the parts to fix all the little issues is $12342.83. Not too bad for a '14 with 154k miles...the engine only has 115 but they don't count lower mileage unless you replace the whole drivetrain. I'm headed to the shop rn to do the cowl and the hood, I guess I could have done a step by step but a)it adds a bunch of time between taking photos and posting and b)we more or less followed the manual procedure anyway. I've got a call out to Sebastian @ Dahle to price a 4wd conversion if we decide to go that route, and I'll post more info on the mods we're making once I have everything done up correctly. Ty for the info on Mahu, I'll dig up the thread tonight and check it out. - laf -
Looking to switch platforms
Local Apparent Friday replied to Local Apparent Friday's topic in Welcome! Introduce Yourself!
It's ALLLLIIIIIIVVVVVEEEEEE! Still have some things to get sorted, like re-torquing and then re-re-torquing the headers. Also I'm throwing a random misfire (0300) code that I think is related to an o2 sensor. I pulled the data from my scanner and I'm not showing any voltage reading on the front left. I'm going to swap them tomorrow and see if it switches sides before ordering replacements. Also unclear on why I have such a difference in the rear voltage readings. I have to peel off first thing to go help a buddy out with his van, but hoping to get the headers torqued, the o2 sensor confirmed, then I can put the cowl back together and put the hood on. We have a 4 wheel alignment scheduled for Friday, and I also need to see about getting it to Nissan for the airbag recall, and my front seat is currently a wal-mart foldable camping chair, but progress is being made! I put the blower motor back in, resolving my A/C issues, and pulled it back into the shop under her own power tonight! For your amusement, it takes [me] 34 minutes to take the truck apart, swap the starter, and put it all back together again, and then it takes [me] another 15 to find the loose cable between the battery and the relay box and realize that it wasn't the starter at all, and that I missed the main starter supply cable when hooking the wires back to the distro block. Thanks for following along. -laf -
Looking to switch platforms
Local Apparent Friday replied to Local Apparent Friday's topic in Welcome! Introduce Yourself!
Aaaaaannnnnddddd I'm back again. Short version, it doesn't run, but it's all mostly all back together. Got almost everything buttoned up and went to start it to fill up the oil filter and the battery is dead from me pushing the van around in neutral, so now it's on the charger. Also, I loaned my welder out so tomorrow I have to find someone to cut the flange off the right hand B pipe and weld it back together again. The B pipes were supposed to be direct bolt in according to the email exchange before I purchased, but apparently the one flange is rotated differently on the back of the bpipe as compared to the trucks. SO - If you are ordering the JBA catted shorties from Cajun with any of their B Pipes, I would request that they not weld the one flange (passenger side - rear) onto the B pipe and then you can either do it yourself or take it to a shop. Alternatively, the catted shorties match up to the factory b pipes just fine, so you could just order the headers and then keep the rear cats/factory B pipes. I'll come back in a few and upload a photo once I grab my phone so you can see what I'm talking about. Also, if you're like me and after having to swap a bunch of parts because the engines aren't the same, and then you bolt the engine in there, and then the very last thing you do is bolt up the plate/torque converter at which point you have an "Oh S%^t!" moment because you never once compared the two, have no fear, it bolts up just fine. My airaid came early, so that's cool. Short list for tomorrow; Cut/weld b pipe flange Acquire 6" fernco for airaid intake Acquire 3/8" tee/steel dish cleaner for catch can hose reroute Acquire distilled water for cooling system Acquire 5/8" hose for blowby reroute Connect battery, clean TB, profit. Only things left at this point are to put the cowl all back together, the pass inner fender liner, and put the hood back on. Some thoughts while it's fresh in my mind; Be realllllly sure about your tq specs...remember the last of the numbers in the diagrams is INCH pounds. It's baffling how little some of these bolts are torqued. Don't leave the tq converter to the last thing...you'll have to loosen the tranny. Better plan is to start all tranny bolts, then start tq converter bolts while you still have separation. Alternatively, you can use a flat bar to provide enough friction against the tq converter in order to spin the plate separately to line up the holes, after you've loosed the tranny enough to reduce the friction. If you follow the nissan engine manual, you can skip pulling the radiator, the trans and the lower crossbar. In the case of the trans, you'll need to remove 3 bolts holding the oil lines to the trans/engine on the pass side, as well as the trans harness, which drops down the back of the engine. There are 9 bolts to remove the trans, 8 of them can be gotten from below. The last is on the top on the pass side of the starter, all are 19mm. Once the shroud and mechanical fan are out, there is a mountain of room up front. Just be sure to protect the radiator...in my case I took a 5/8" sheet of plywood roughly the size of the radiator, drilled two holes in the top, then used a loop of string to hang it from the hood latch in case the engine came swinging forward, but I never got close. If you pull the engine mount bolts that run from the bottom up, you have to jimmy it forward and you risk bending the mounts. Instead, pull the 4 that run top down, and it'll lift right off the beds, you'll still have (2) alignment dowels from trans to contend with. Ziplock baggies labeled with a sharpie for each individual set of fasterners, ie coils, inner fender, intake, etc, etc and it helps to use painters tape to label the wiring harness, but it's also not hard to figure out. Just take a bunch of pics beforehand. On the pass side, there is a grounding wire from the harness that bolts to the side of the head, and then there is a much smaller gauge wire with an eye on the end that comes off of that. It goes on the underside of the inner fender. Just because the engine is out doesn't mean the truck will roll wherever you want it. You still have to reconnect the battery, turn the key and put it in neutral in order to push/pull it around. Lastly, don't forget to charge the battery after you're done pushing/pulling it around, or you're going to be disappointed when it just clicks.? If I think of anything else once I'm done done, I'll add it. If anybody has any specific questions that come to mind, please ask for perpetuity, it may help someone in the future. - laf